How to Buy WordPress PBN Hosting At SeekaHost Portal
How to Buy WordPress PBN Hosting with the Best WordPress hosting control panel and Management Tool available. Easy blog creations and expired domain migration with the SeekaHost Portal.
Why Use PBN Hosting?
PBN hosting is a great way to build your sites using expired domains hosted with separate IPs that already hold a lot of key features. Backlinks from other reputable sights, traffic occurring from the original source and much more.
By using this as a starting tool to a blog will be much more advantageous than starting with a brand new domain.
Having a number of well-maintained Blogs using good expired domains that are producing relevant content with lots of keywords and useful links to your main site is key.
And SeekaHost has made one of the most simple to use Domain Hosting Control Panel’s there is currently on the market.

Important Things to Consider
All though it was common practice up until 2017 to create loads of Private Blogs with keywords and links to a site to build its SEO potential. It is now changed to detect whether the content your producing is actually of any quality. Content that is oversaturated with un relevant links and keywords used to boost another site can sometimes score you negatively with SEO.
So make sure to produce quality content with relevant links to your other sites.
How to Buy WordPress PBN Hosting Video Tutorial
Step by Step Guide to Buy WordPress PBN Hosting
- Make an account on SeekaHost.app and then find the package that suits you. The larger the package you buy, the cheaper each individual blog will be.
- Once you have purchased your package then log into SeekaHost.app client area with your details.
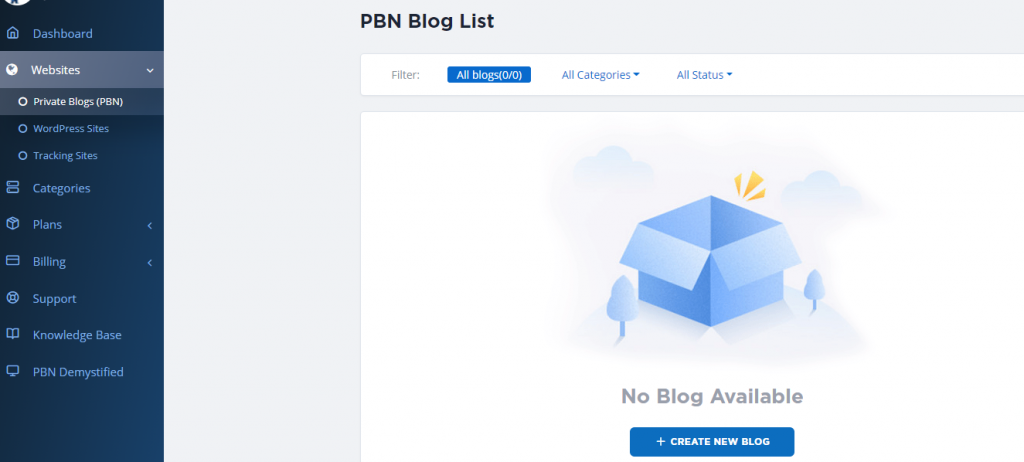
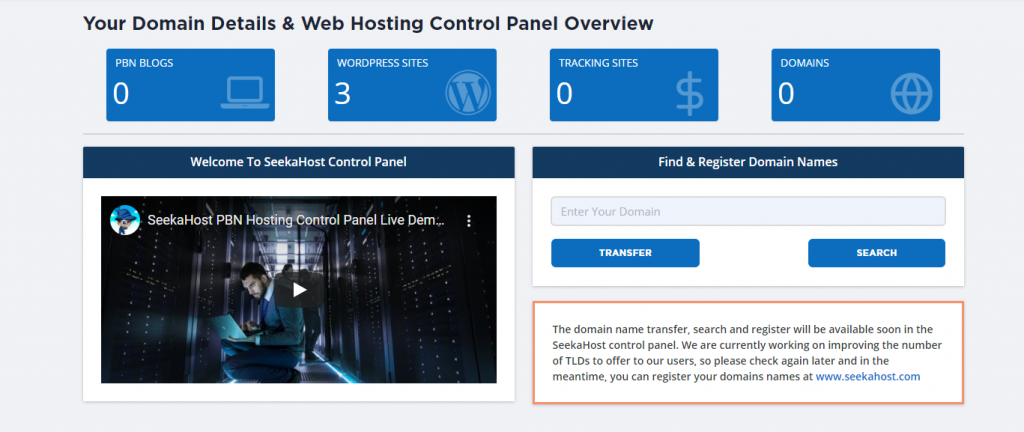
- On the main dashboard, you will see the top options. PBN Blogs, WordPress Sites, Tracking Sites and Domains. Click on PBN Blogs.
- Now select the Create New Blog button.
- Type in your domain name (without the www.) if you have not got one yet, you can check for domains here.
- Select the category, it will start as default if this is your first blog creation.
- Input your blog title and also select whether to leave it visible or not.
- Click on Create Blog.
- Once loaded up you can now click the Blue Action Button next to your blog to check or edit details.

From here you can access your login details, your nameservers 1 and 2 to match your domain to the hosting. and everything else you might need for your Personal Blog all in one useful page.
If you are unsure how to move site hosting or name servers check out our tutorial here which explains both in details with a guide.
Useful Expired Domain Links
Author Profile

- Online Media Creator and Specialist Minecraft Server Hosting expert at SeekaHost. Creating videos on WordPress, Minecraft and much more for the digital economy.
Latest entries
 Business Web HostingJuly 4, 2024Get a Online Booking System for Website: Custom Build for You Business Needs
 Changing Web HostApril 25, 2024The Ultimate Guide on Squarespace to WordPress Migration Services
 Domain RegistrationDecember 4, 2023What is Premium Domain Name and Benefits of Premium Domain?
 Artificial IntelligenceDecember 4, 2023How to create AI Images you can edit or re-use again


